Installation on Windows
Before you work through the installation instructions, make sure you have an Administrator user who has rights to change your computer’s settings.
First, we’ll start by downloading Node.js. You need a JavaScript runtime to run Rails, and Node.js is a pretty popular one 😉
-
Click here to download the Node.js Windows installer.
-
Once the download is finished, go to your Downloads directory and find the Node.js Windows Installer. The file should be named something like
node-v6.9.5-x86.msi. -
Double click the file to run the installer.
Accept the license agreement and keep all the default settings.
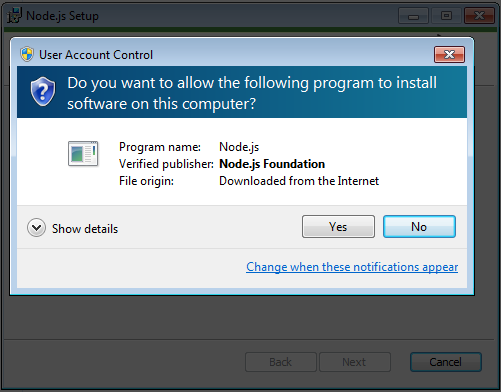
If Windows asks you if you want to let the installer install software on your computer, click “Yes”.
Now, we’re going to install Ruby using the RubyInstaller for Windows.
-
Click here to download the Ruby Installer.
-
When the download finishes, go to your Downloads directory, and find the RubyInstaller. It should be named something like
rubyinstaller-2.3.1.exe. -
Double click to the file to run the installer.
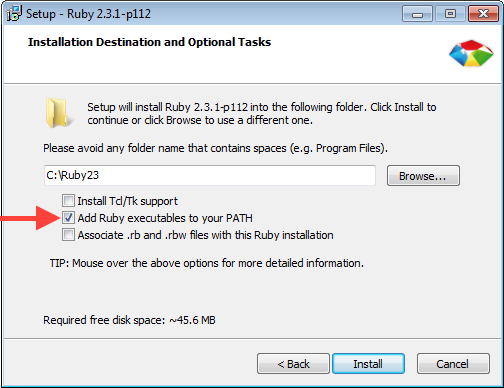
You can keep most of the default settings, but on the third screen of the RubyInstaller you will need to check the option to “Add Ruby executables to your PATH”.
When the RubyInstaller finishes your computer will have Ruby 2.3.1.
Let’s verify that the RubyInstaller actually installed Ruby 2.3.1 by taking a look on the Command Prompt.
-
There are a number of ways to open the Command Prompt, but I’m lazy so I just like to search for it. 😉
The search bar moves around on different versions of Windows.
Once you find the search bar, search for “Command Prompt”. The Command Prompt should be the first item in your search results.
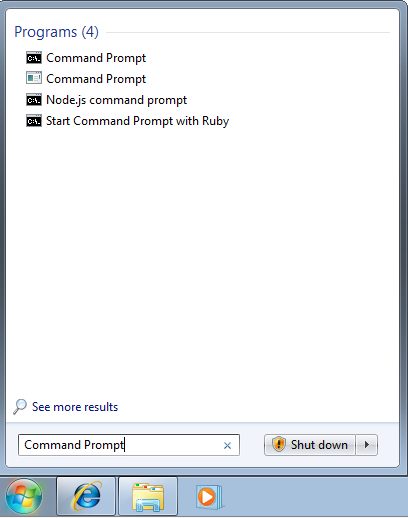
Then, you can open the Command Prompt from your search results.
-
To verify your Ruby install, type
ruby -vinto the Command Prompt and pressenter.ruby -vwill print the complete version information for the version of Ruby installed on your computer.If the RubyInstaller did its job,
ruby -vshould print at least “ruby 2.3.1”.ruby -v ruby 2.3.1p112 (2016-04-26 revision 54768) [i386-mingw32]If you don’t see something like “ruby 2.3.1”, try re-running the RubyInstaller and make sure you have the “Add Ruby executables to you PATH” option selected.
C:\Users\awesomesauce>ruby -v
ruby 2.3.1p112 (2016-04-26 revision 54768) [i386-mingw32]
In the next few sections, we’re going to ask you to run more commands like ruby -v on the Command Prompt.
To run these commands, you’ll type them in the Command Prompt and press enter to execute them.
To make your development experience just a little bit nicer, we’ll now install the RubyInstaller DevKit.
-
Click here to download the RubyInstaller DevKit.
-
Once the download is finished, go to your Downloads directory and find the DevKit package. It should be named something like
DevKit-mingw64-32-4.7.2-20130224-1151-sfx.exe. -
Double click the file to install the DevKit.
When prompted, extract the contents of the DevKit into
C:\RubyDevKit.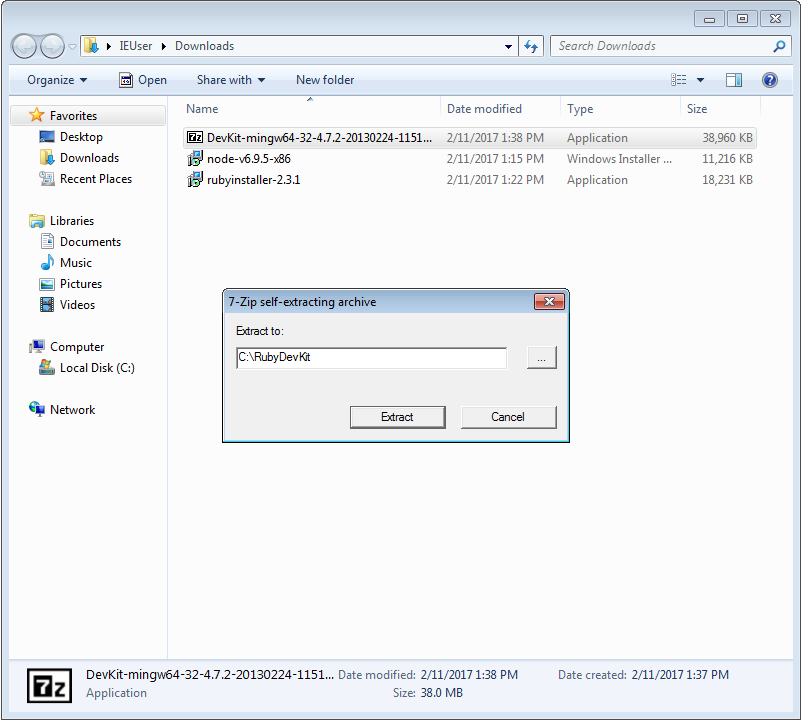
-
To install the DevKit we’ll need to run a couple of commands. Open the Command Prompt.
First, run
ruby C:\RubyDevKit\dk.rb initto initialize the DevKit.
Then, run
ruby C:\RubyDevKit\dk.rb installto install it on your computer.
C:\Users\awesomesauce>ruby C:\RubyDevKit\dk.rb init
[INFO] found RubyInstaller v2.3.1 at C:\Ruby23

Initialization complete! Please review and modify the auto-generated 'config.yml' file to ensure it contains the root directories to all of hte installed Rubies you want enhanced by the DevKit.

C:\Users\awesomesauce>ruby C:\RubyDevKit\dk.rb install
[INFO] Updating convenience notice gem override for 'C:\Ruby23'
[INFO] Installing 'C:/Ruby23/lib/ruby/site_ruby/devkit.rb'
Before you can install Rails, you’ll need to apply an update for RubyGems.
-
Click here to download the RubyGems update.
Just like the previous things you downloaded, the RubyGems update will also be downloaded into your Downloads directory.
-
After the download finishes, open Command Prompt.
-
Let’s see if we can find the RubyGems update file from the Command Prompt.
The RubyInstaller DevKit includes some additional commands that you can run on the Command Prompt. To make these commands available, run the following:
C:\RubyDevKit\devkitvars.bat -
Now, try running the following command:
ls -l DownloadsThis will list all the contents of your Downloads directory. It might be a little messy, but somewhere in there you should see a file named
rubygems-update-2.6.7.gem.The full path to the RubyGems update is
C:\Users\USERNAME\Downloads\rubygems-update-2.6.7.gemwhere USERNAME is your username. -
If you’ve found the RubyGems update file in your Downloads directory, you can move on to the next step.
Otherwise, you’ll need to download the RubyGems update and make sure it’s in your Donwloads directory.
C:\Users\awesomesauce>C:\RubyDevKit\devkitvars.bat
Adding the DevKit to PATH...

C:\Users\awesomesauce>ls -l Downloads
-rwxr-xr-x 1 IEUser Administrators 39895023 Feb 11 13:37 DevKit-mingw64-32-4.7.2-20130224-1151-sfx.exe
-rw-r--r-- 1 IEUser Administrators      282 Nov 23  2014 desktop.ini
-rw-r--r-- 1 IEUser Administrators 11485184 Feb 11 13:15 node-v6.9.5-x86.msi
-rw-r--r-- 1 IEUser Administrators   727040 Feb 11 13:44 rubygems-update-2.6.7.gem
-rwxr-xr-x 1 IEUser Administrators 18667740 Feb 11 13:22 rubyinstaller-2.3.1.exe
The devkitvars.bat file that ships with the RubyInstaller DevKit gives you access to commands you typically only find on Linux machines. You don’t need these commands on Windows, but they can make everyone’s life just a little bit easier. 😊
In the rest of the installation guide, whenever you’re asked to open the Command Prompt please run C:\RubyDevKit\devkitvars.bat.
-
Now, we’re ready to install the RubyGems update. Run the following command, but replace USERNAME with your username.
gem install --local C:\Users\USERNAME\Downloads\rubygems-update-2.6.7.gem --no-document -
Then, run the update:
update_rubygems --no-document -
Run the following command to verify that the update was installed:
gem --versionIt should return 2.6.7.
-
Now that you’ve installed the update, you can remove the update file. Run:
gem uninstall rubygems-update -x
C:\Users\awesomesauce>gem install --local C:\Users\awesomesauce\Downloads\rubygems-update-2.6.7.gem --no-document
Successfully installed rubygems-update-2.6.7
1 gem installed

C:\Users\awesomesauce>update_rubygems --no-document
RubyGems 2.6.7 installed

=== 2.6.7 / 2016-09-26

Bug fixes:
...

---------------------------------------------------
RubyGems installed the following executables:
        C:/Ruby23/bin/gem

C:\Users\awesomesauce>gem --version
2.6.7

C:\Users\awesomesauce>gem uninstall rubygems-update -x
Removing update_rubygems
Successfully uinstalled rubygems-update-2.6.7
Now, we’re ready to install Rails! 🎉
-
Open the Command Prompt and run the following command to install Rails:
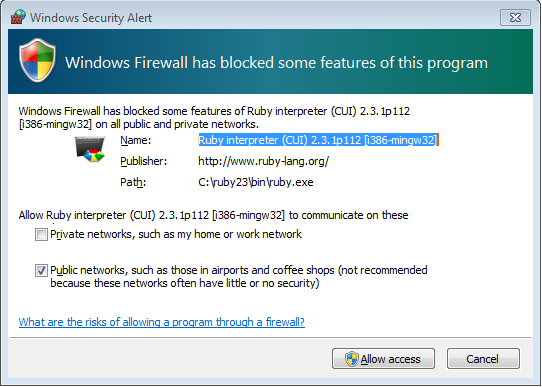
gem install rails --version 5.0.1 --no-documentWindows Firewall may ask you to give Ruby access to public networks. If it does, click “Allow access”.
-
To verify the install, run
rails -vIt should return Rails 5.0.1.
C:\Users\awesomesauce>gem install rails --version 5.0.1 --no-document
Fetching: i18n-0.8.0.gem (100%)
Successfully installed i18n-0.8.0
Fetching: thread_safe-0.3.5.gem (100%)
...
Fetching: rails-5.0.1.gem (100%)
Successfully installed rails-5.0.1
36 gems installed

C:\Users\awesomesauce>rails -v
Rails 5.0.1
Finally, we’ll check if everything is working by creating a new Rails app.
-
Open the Command Prompt and run the following command to create a new Rails app called “installfest”.
rails new installfestThis will add a new directory to your computer named “installfest”. It will have all the contents of a new Rails application.
-
From Command Prompt, go into the new “installfest” directory by running:
cd installfest -
Now, start the Rails application by running
rails server -
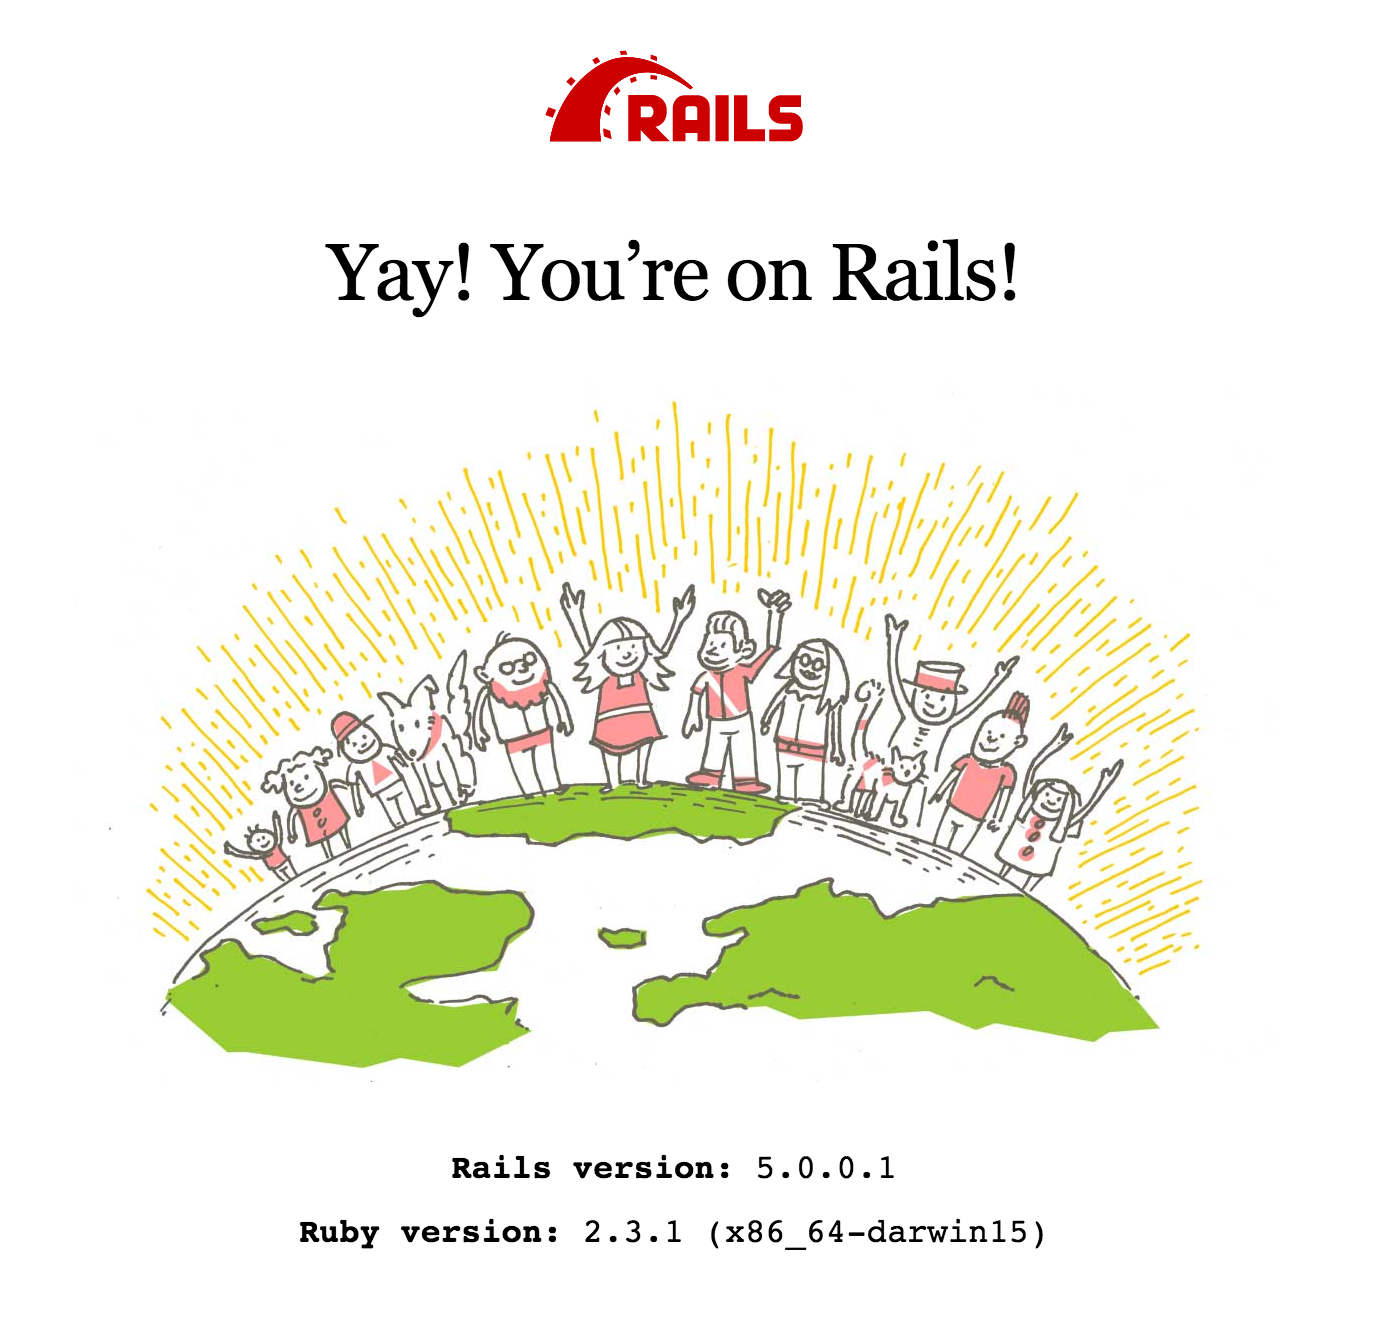
Go to http://localhost:3000 to see the running application!
You should see a welcome screen that looks like this:
-
Now that you’ve verified everything is working, you can stop the application by running
Ctrl-cin the Command Prompt.You might be asked if you’d like to
Terminate batch job (Y/N)?. Simply typeyand pressenter. -
You can also remove the “installfest” directory by running the following commands:
cd ..
rm -rf installfest
C:\Users\awesomesauce>rails new installfest
      create
      create  README.md
      create  Rakefile
      create  config.ru
      create  .gitignore
      create  Gemfile
      ...
         run  bundle install
      ...
      Bundle complete! 12 Gemfile dependencies, 56 gems now installed.
      Use 'bundle show [gemname]' to see where a bundled gem is installed.

C:\Users\awesomesauce>cd installfest

C:\Users\awesomesauce\installfest>rails server
=> Booting Puma
=> Rails 5.0.1 application starting in development on http://localhost:3000
...
Use Ctrl-C to stop
Started GET "/" for 127.0.0.1 at 2017-02-11 12:47:30 -0800
Processing by Rails::WelcomeController#index as HTML
  Parameters: {"internal"=>true}
  Rendering C:/Ruby23/lib/ruby/gems/2.3.0/gems/railties-5.0.1/lib/rails/templates/rails/welcome/index.html.erb
  Rendering C:/Ruby23/lib/ruby/gems/2.3.0/gems/railties-5.0.1/lib/rails/templates/rails/welcome/index.html.erb (15.6ms)
Completed 200 OK in 78ms (Views: 42.6ms | ActiveRecord: 0.0ms)


Exiting
Terminate batch job (Y/N)? y

C:\Users\awesomesauce\installfest>cd ..

C:\Users\awesomesauce>rm -rf installfest